These are the instructions for installing Godot Steam, a Godot fork that has steam combatably built in.
It also includes raw Steamworks SDK file witch is required for YOMIH to work.
In our case YOMIH specifically uses version 3.5.1 of this program, so we will be installing that.
Make a new folder to storeGodot Steamin.(Name it something likeyomi-godotas this will most likely only be used for modding)
Godot Steam is a portable application it is recommended to put it in your portable installation folder, if you have one.
If you don’t have one, we highly recommend making one, as you will come across applications like this pretty often.
(Personally I just have a folder namedProgramsin myDesktop to place them in)*
Extract the *Godot Steam* ``.zip`` into the new folder.
Run thewindows-351-editor-64bit.exefile.
This will the executable you open to run the Godot Steam Editor.
(ie. What you will open to actually mod)
(Optional)Create a shortcut towindows-351-editor-64bit.exeon yourDesktop.
Name it YOMIGodot if you want.
Tip
Here is an icon for the shortcut you can download for the shortcut.
Make a new directory to storeGodot Steamin.(Name it something likeyomi-godotas this will most likely only be used for modding)
Godot Steam is a portable application it is recommended to put it in your portable installation folder, if you have one.
If you don’t have one, we highly recommend making one, as you will come across applications like this pretty often.
(Personally I just have a directory namedProgramsin~/Documentsto place them in)
Important
Set YOMI_GODOT_DIR= to the full path you want to store Godot Steam inside.
(Path starting from root)
Make a new folder to storeGDSDecompin.(You technically don’t have to, but personally i would)
GDSDecomp is a portable application it is recommended to put it in your portable installation folder, if you have one.
If you don’t have one, we highly recommend making one, as you will come across applications like this pretty often.
(Personally I just have a folder namedProgramsin myDesktopto place them in)
Extract theGDSDecomp.zipinto the new folder.
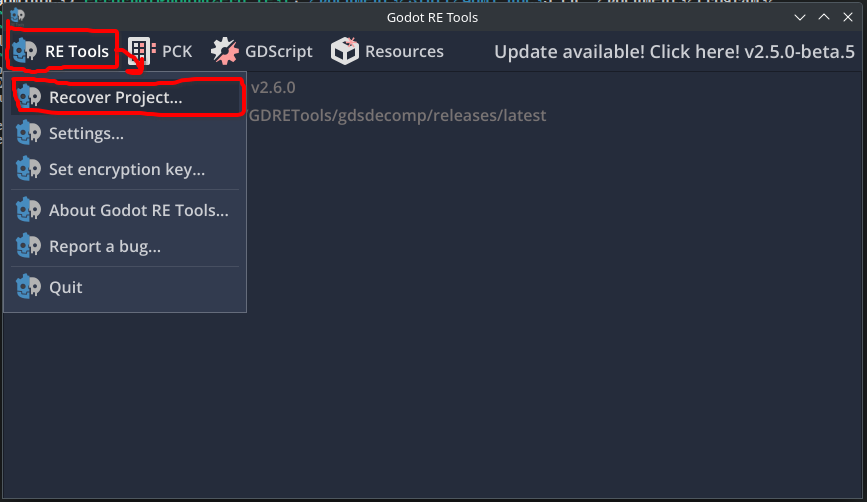
Rungdre_tools.x86_64.
Tip
Make sure to remember the location of this executable.
You will use it in the Decompiling YOMI Hustle Section.
Make a new directory to storeGDSDecompin.(You technically don’t have to, but personally i would)
GDSDecomp is a portable application it is recommended to put it in your portable installation folder, if you have one.
If you don’t have one, we highly recommend making one, as you will come across applications like this pretty often.
(Personally I just have a directory namedProgramsin~/Documentsto place them in)
Important
Set GDSDECOMP_DIR= to the full path you want to store GDSDecomp inside.
(Path starting from root)
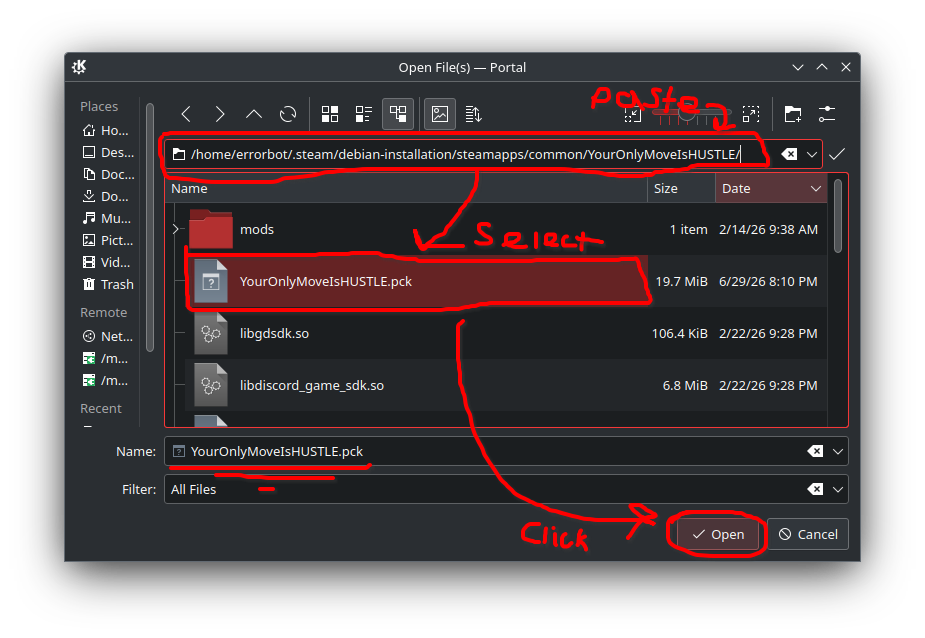
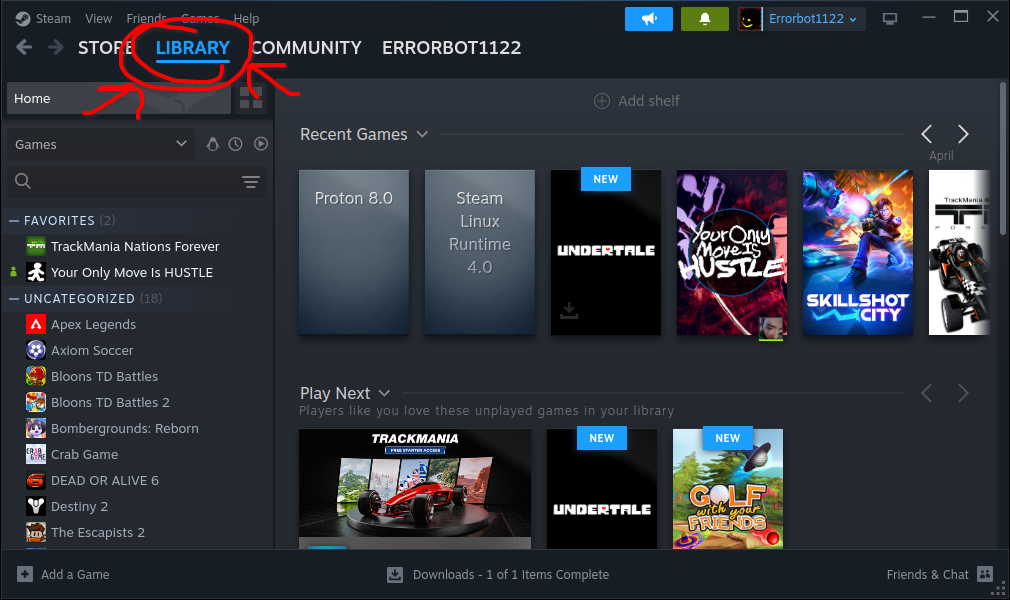
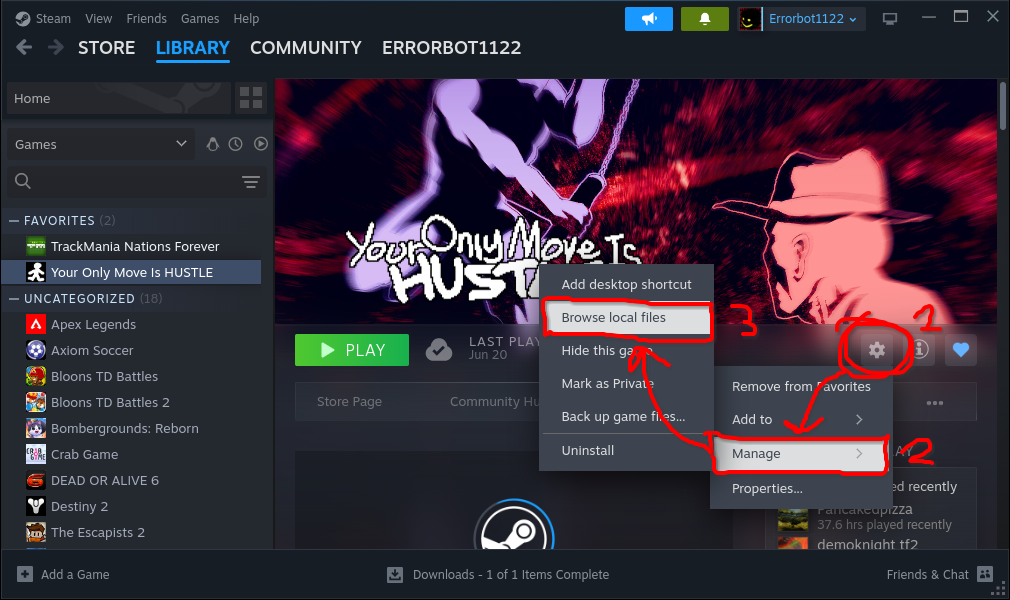
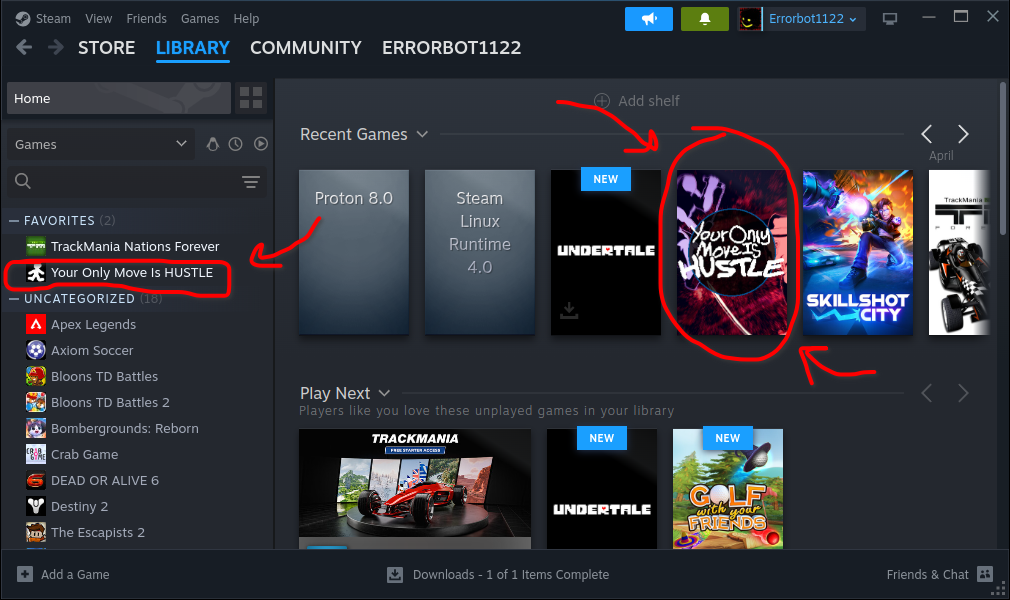
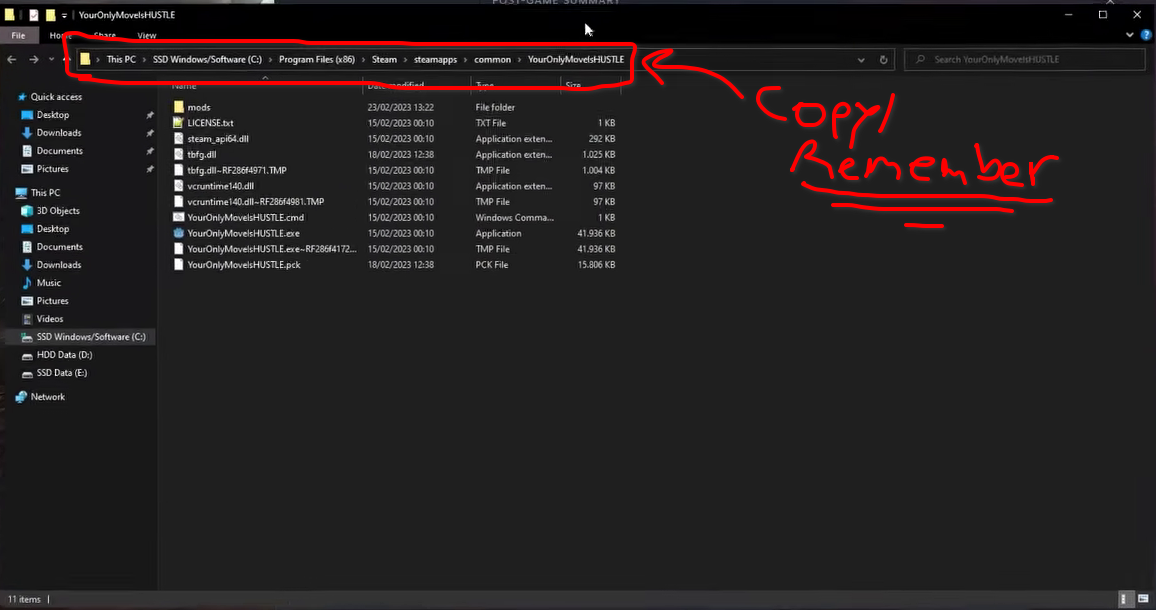
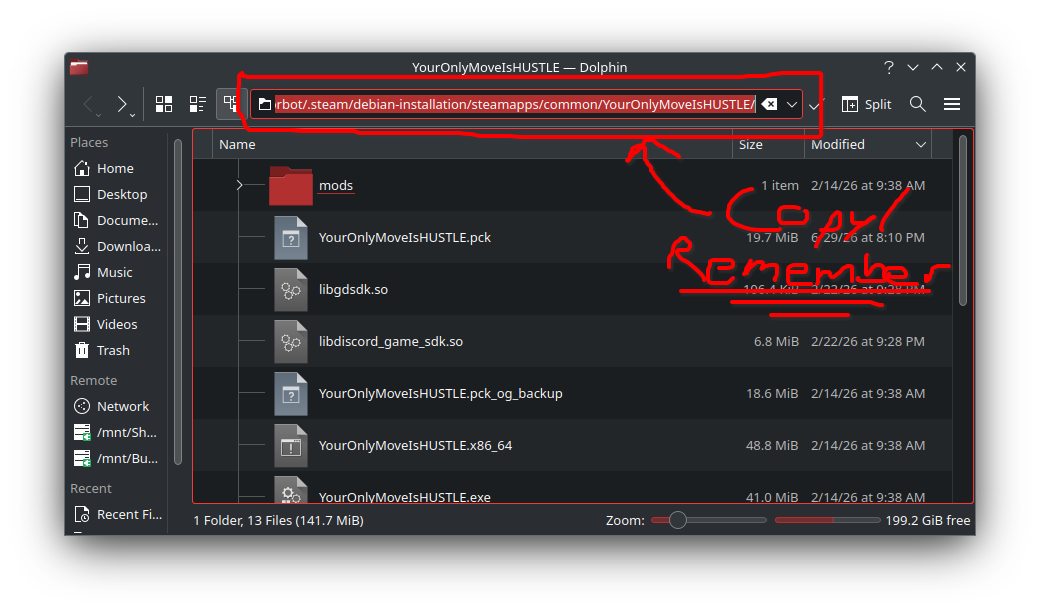
Navigate to/paste the folder location of yourYOMI Hustleinstallation, and select the file namedYourOnlyMoveIsHUSTLE.pck.
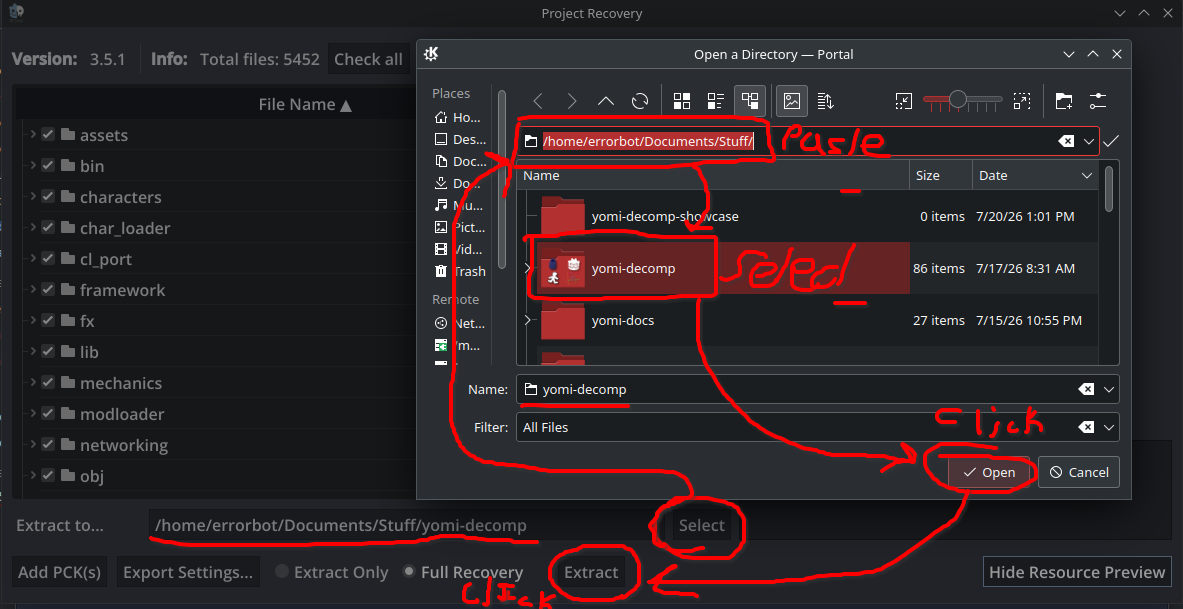
Wait for it to load, click theSelectbutton near the bottom of the screen, then navigate to/paste the folder you CHOSE to store the decompiled code ofYOMI Hustlein. Finally,Openit and hitExtract.
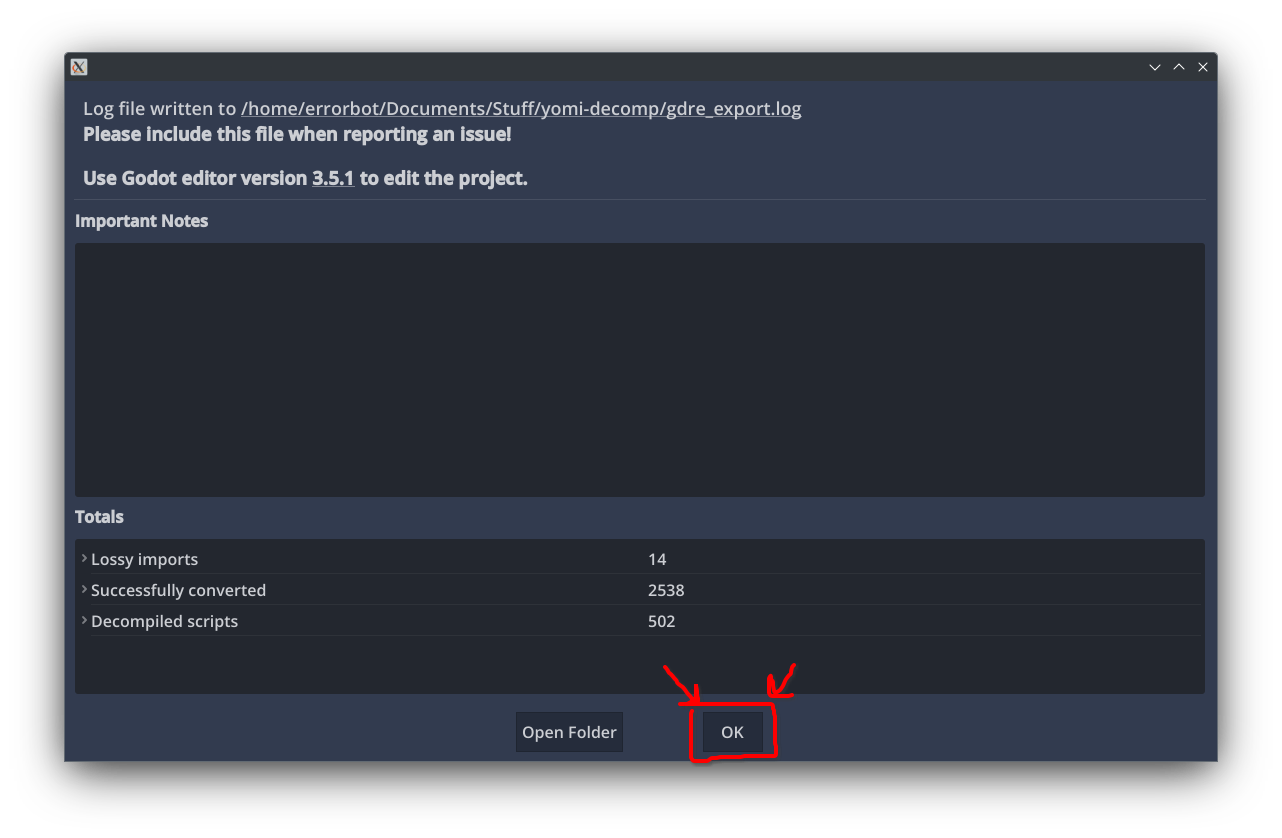
Wait a while as the decompilation process runs. You may see warning or errors popup in the log area you can ignore them.
Once the popup appers, hitOKand closeGDSDecomp.
Tip
If you want to varify your decompilation, you can do that by opening the folder you chose to store the compilation in, and checking to see if everything looks good.
Navigate back to the location of yourYOMI Hustleinstallation, open thelib folder, and copy the file named tbfg.dll.
Note
On Linux,tbfg.dll is actually named tbfg.so.
Warning
If you forget to do this, the game will crash as soon as you try to run it.
tbfgstands forTurn Based Fighting Game.
Navigate back to the location of the folder you chose to store the decompiled code ofYOMI Hustlein. Then open thelibfolder in there, and pastetbfgin there.
NowNavigate back to the location of yourGDSDecompinstallation, and copy the file namedsteam_api64.dll(orsteam_api32.dllin the32bitversion) and copy it.
Note
On Linux,steam_api64.dll is actually named libsteam_api.so.
Warning
If you forget to do this, running the project will do nothing and won’t even give you an error message.
Also hitting Quittoprojectlist won’t open the project list after quitting.
Finally, navigate back to the decompiled code folder, and paste thesteamlibrary directly into the root of the project.
On Linux, you may be required to run "$YOMI_GODOT_DIR/linux-351-editor.64" in your terminal to get it to accually run.
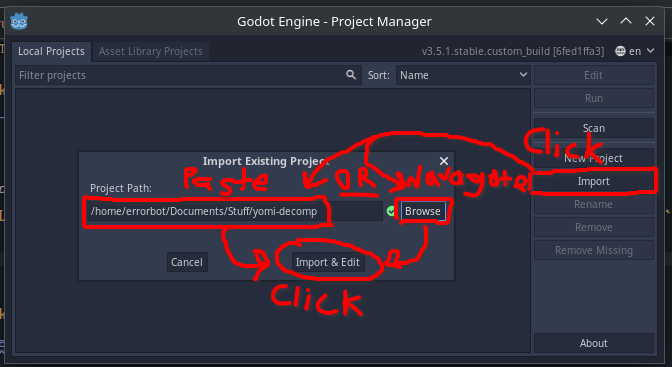
Click theImportbutton on the sidebar, then navigate to/paste the folder path for your :ref`YOMI Hustle <yverb-yomih>` decompilation. Finally click theImport & Editbutton.
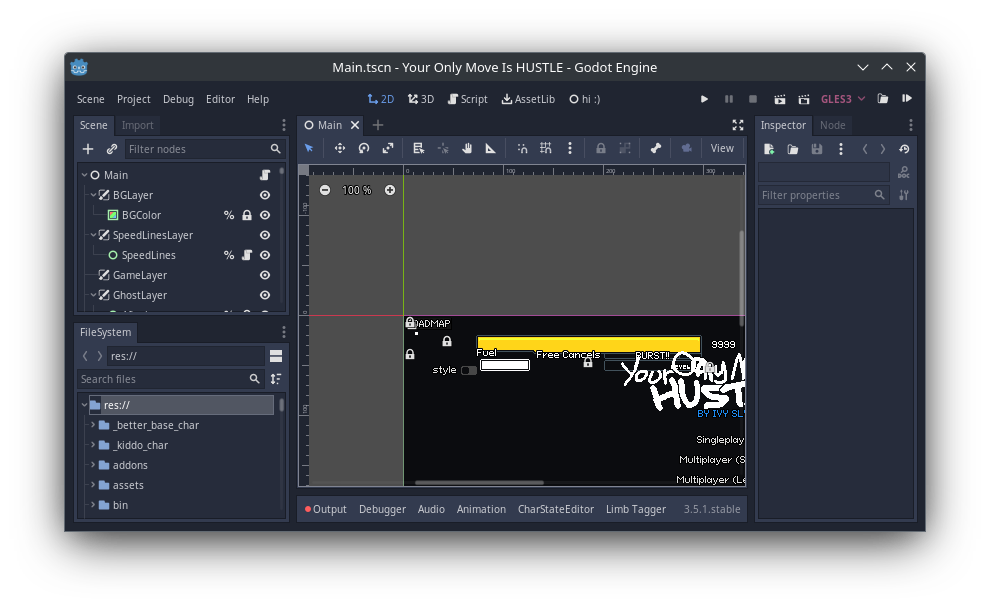
After doing that, it should automatically show the splash screen and open the project.
If it looks something like this you did everything correct:
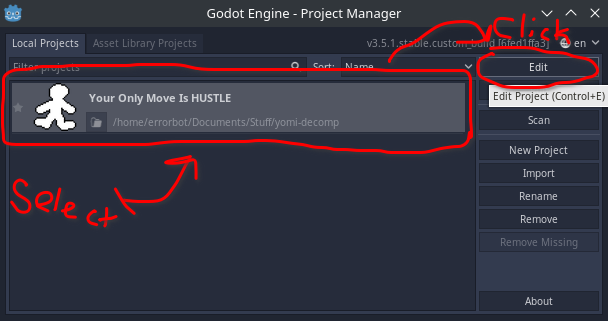
To open the Decompiled YOMI from now on, just select it from the Project Manager window, and click the Edit button on the sidebar.
Tip
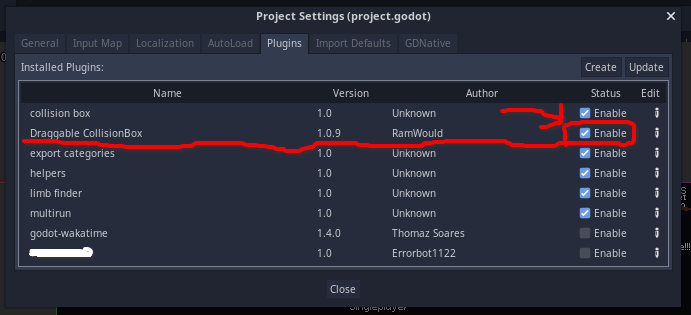
Now if you want to make Mod development a little faster, you can install some of the recommended plugins.
Move the.zip( Cut [Ctrl/Command+X] file, then paste [Ctrl/Command+P] at new location)to theaddonsfolder in the :ref:`YOMI Hustle <yverb-yomih>` decompilation.
Make a new folder inaddonswith the same name as the plugin’s.zip(Without the ``.zip`` extension)and move the.zipin there.
Note
Technically this isn’t needed, but some .zip don’t have an internal folder, so extacting can “spill” its contents everywhere.
Extract the zip into that folder
Note
Most likely there will be another folder inside.
If this is the case, enter the folder, select all items index, move them to the parent folder, then delete the empty folder.
Open theYOMI Hustledecompilation project inGodot Steam.
SelectProject > Project SettingsOn the top bar, then in the new window select thePluginsTab, then make sure the new plugin has a checkmark on there row.
Tip
If you ever to to update a plugin, delete the plugin’s folder, then follow steps 1-6.
You can create a shortcut to automatically open the project on your terminal and the Desktop by following the below steps:
Creating shortcuts in Linux can be a little more confusing then in Windows.
Here is a mini tutorial on how to do so:
1. Create the helper script.
First you will need to create a bash script in the editor of your choice.
This script will automatically open the*YOMIHdecompiled project.
Name the file yomi-godot.sh, and paste the following:
#!/bin/bashYOMIGDPATH="Enter full yomi-godot path"YOMIDECOMP="Enter full yomi-decomp path"cd$(dirname$YOMIGDPATH)$YOMIGDPATH--editor--path$YOMIDECOMP
We now have to make sure it has the execute permission with the chmod.
chmod+xyomi-godot.sh
After that, move it to the yomi-godot path:
mvyomi-godot.sh$YOMI_GODOT_DIR
Create the.desktopfile.
In your text editor of choice, create a file called yomi-godot.desktop.
Tip
Now if you don’t know, .desktop is the file format used by most distros as what is essentially shortcuts on Linux (specifically for applications).
Whats nice is that the .desktop file is basically just a .cgf file, so we can vary easily modify it and write our own completely from scratch.
Important
Paste the following, replacing all mentions of [YOMI_GODOT_DIR] with the full path for the directory storing Godot Steam.
If you want it to use the above custom icon, downloadithere and place it into the yomi-godot directory.
Then in yomi-godot.desktop, Edit the Icon= line to be Icon=[YOMI_GODOT_DIR]/yomi-godot.ico instead.
Now technically you can just move yomi-godot.desktop to your Desktop and it would work, however, continuing uses a better option.
Add it to your user’s systemapplications.
In most Linux distros, you can add .desktop files to ~/.local/share/applications/ to get them to show up in system menus.
mvyomi-godot.desktop~/.local/share/applications/
After doing that, to make is show up on the Desktop, just create a symbolic link <https://linuxvox.com/blog/what-are-symlinks-in-linux/#1-what-are-symbolic-links> from it, to the Desktop.
If you want to edit/copy/delete the shortcut, remember that this is a and that any actions you do to the one on the Desktop, gets mirrored to the one in ~/.local/share/applications/.
This can especially get confusing when trying to make a copy of the shortcut, as both the original, and the copy will link to the same file.
(Even if they have different names)
To fix this, make sure to make the copy inside of ~/.local/share/applications/ instead, then create a new link from there.
(Super Optional)Link your script to the “``PATH``”
If you also want to be able to acces yomi-godot from the terminal, create a symbolic link from the script to ~/.local/bin/ with the file name yomi-godot.
(No extension)
Great job land-lubber, you have valiantly built a grand vessel to sail the two seas abroad, however a great parting is afoot.
Witch path will you voyage hence forth:
![Watch the "YomiHustle Tutorials - Part 1 - Setup - [The Beeg Series] - (No Coding Series)" by `@Nuion on Youtube <https://www.youtube.com/@Nuion>`_!](https://img.youtube.com/vi/lfAeGR6jasw/maxresdefault.jpg)